


CB Mic USB Interface
A USB interface that allows use of a 4 pin CB mic in games that support a keyboard “push to talk” key. This was intended as a quick prototype for a future project, but works much better than expected.
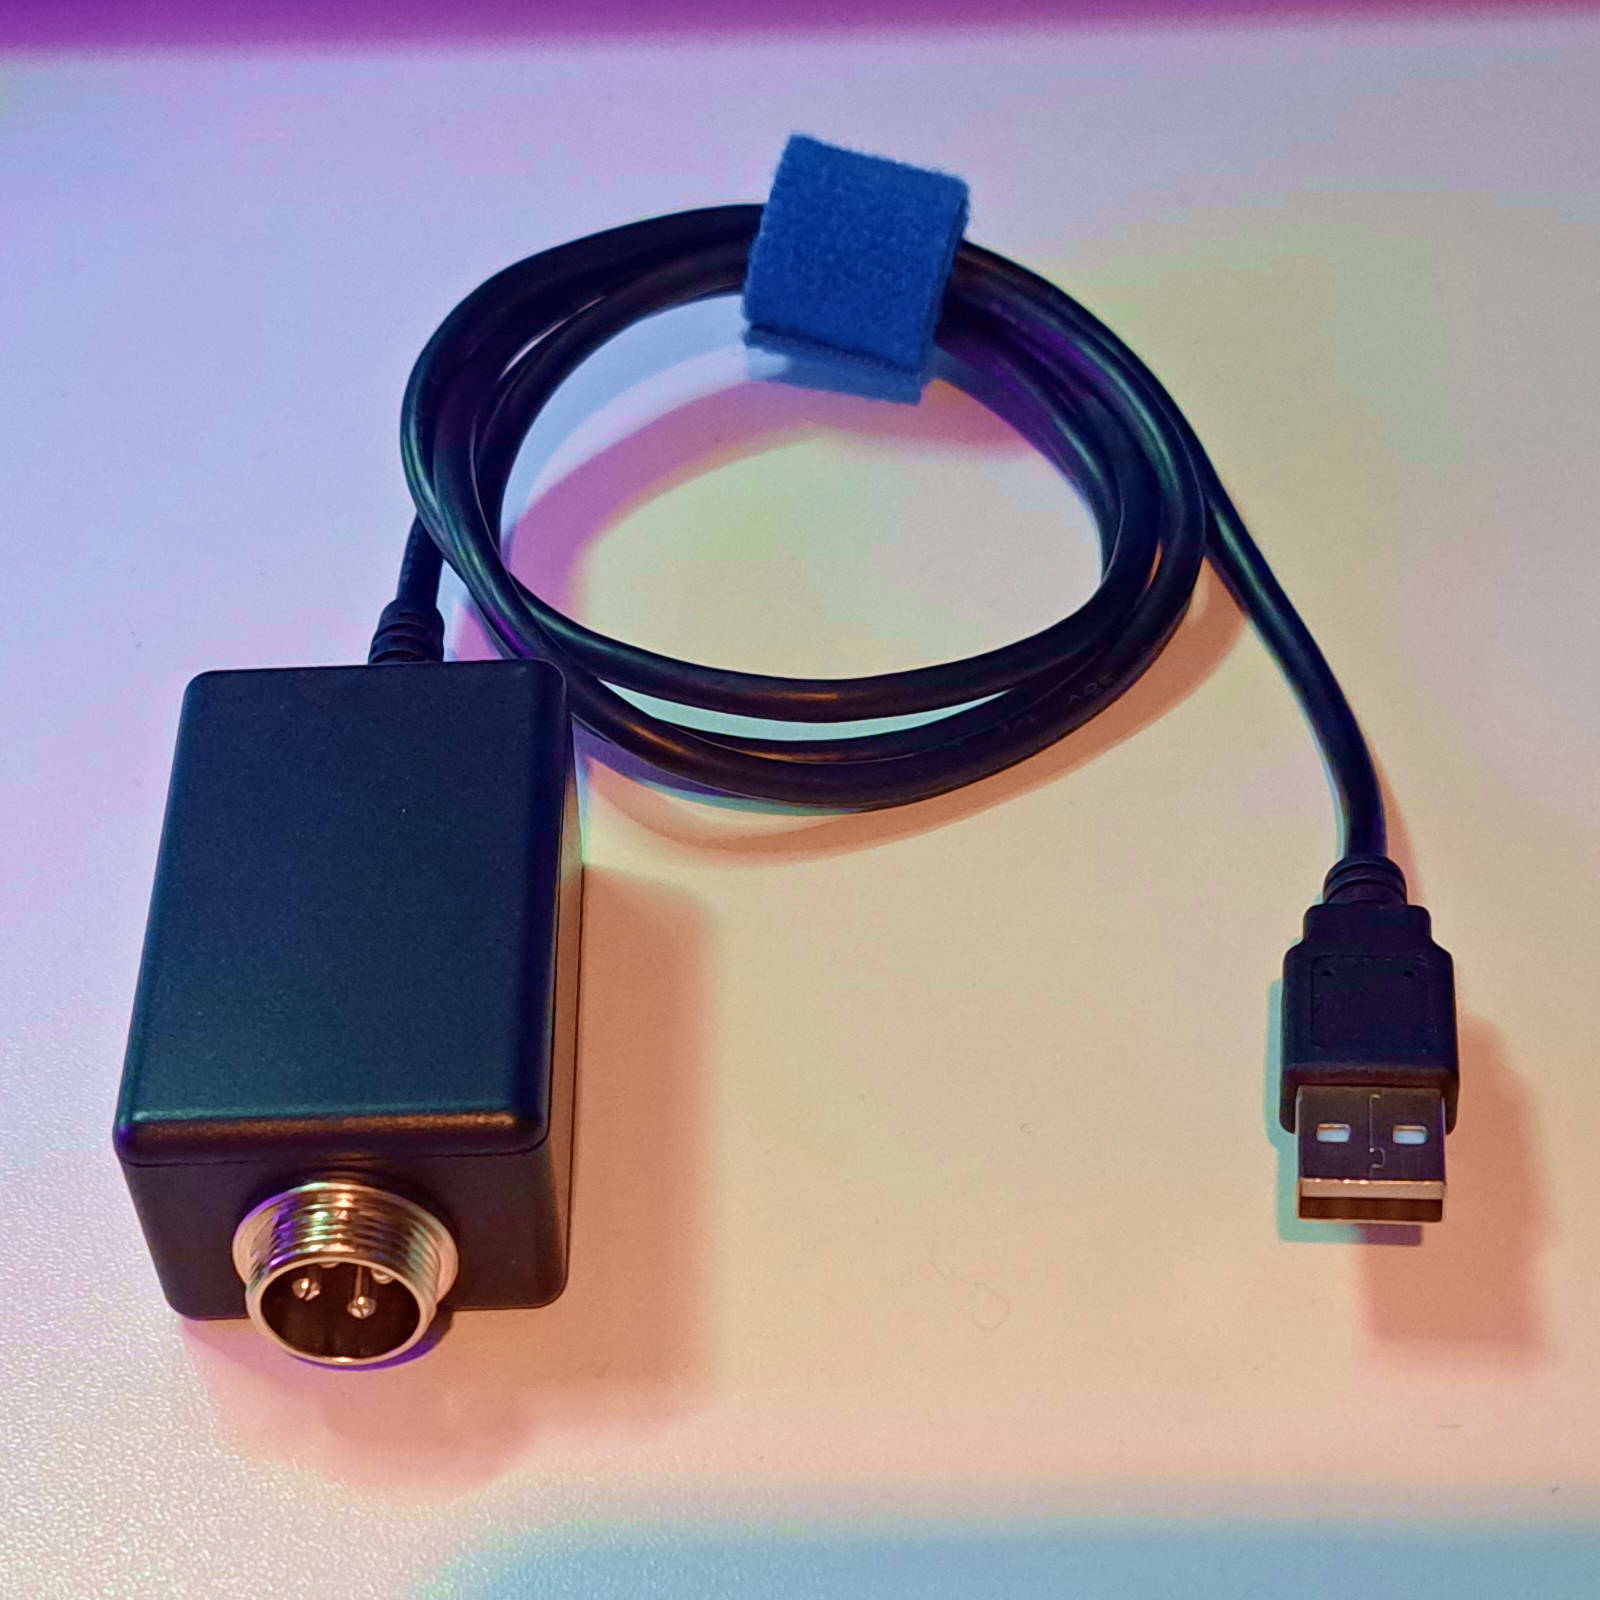
When plugged into a PC, this device will show up as a keyboard and sound card.
The microphone input of the sound card will be audio from the attached CB mic.
The keyboard will emit an x key when the PTT button is pressed. Using the
parts listed below will result in a “plug and play” device that requires no
setup (except key binding in-game).
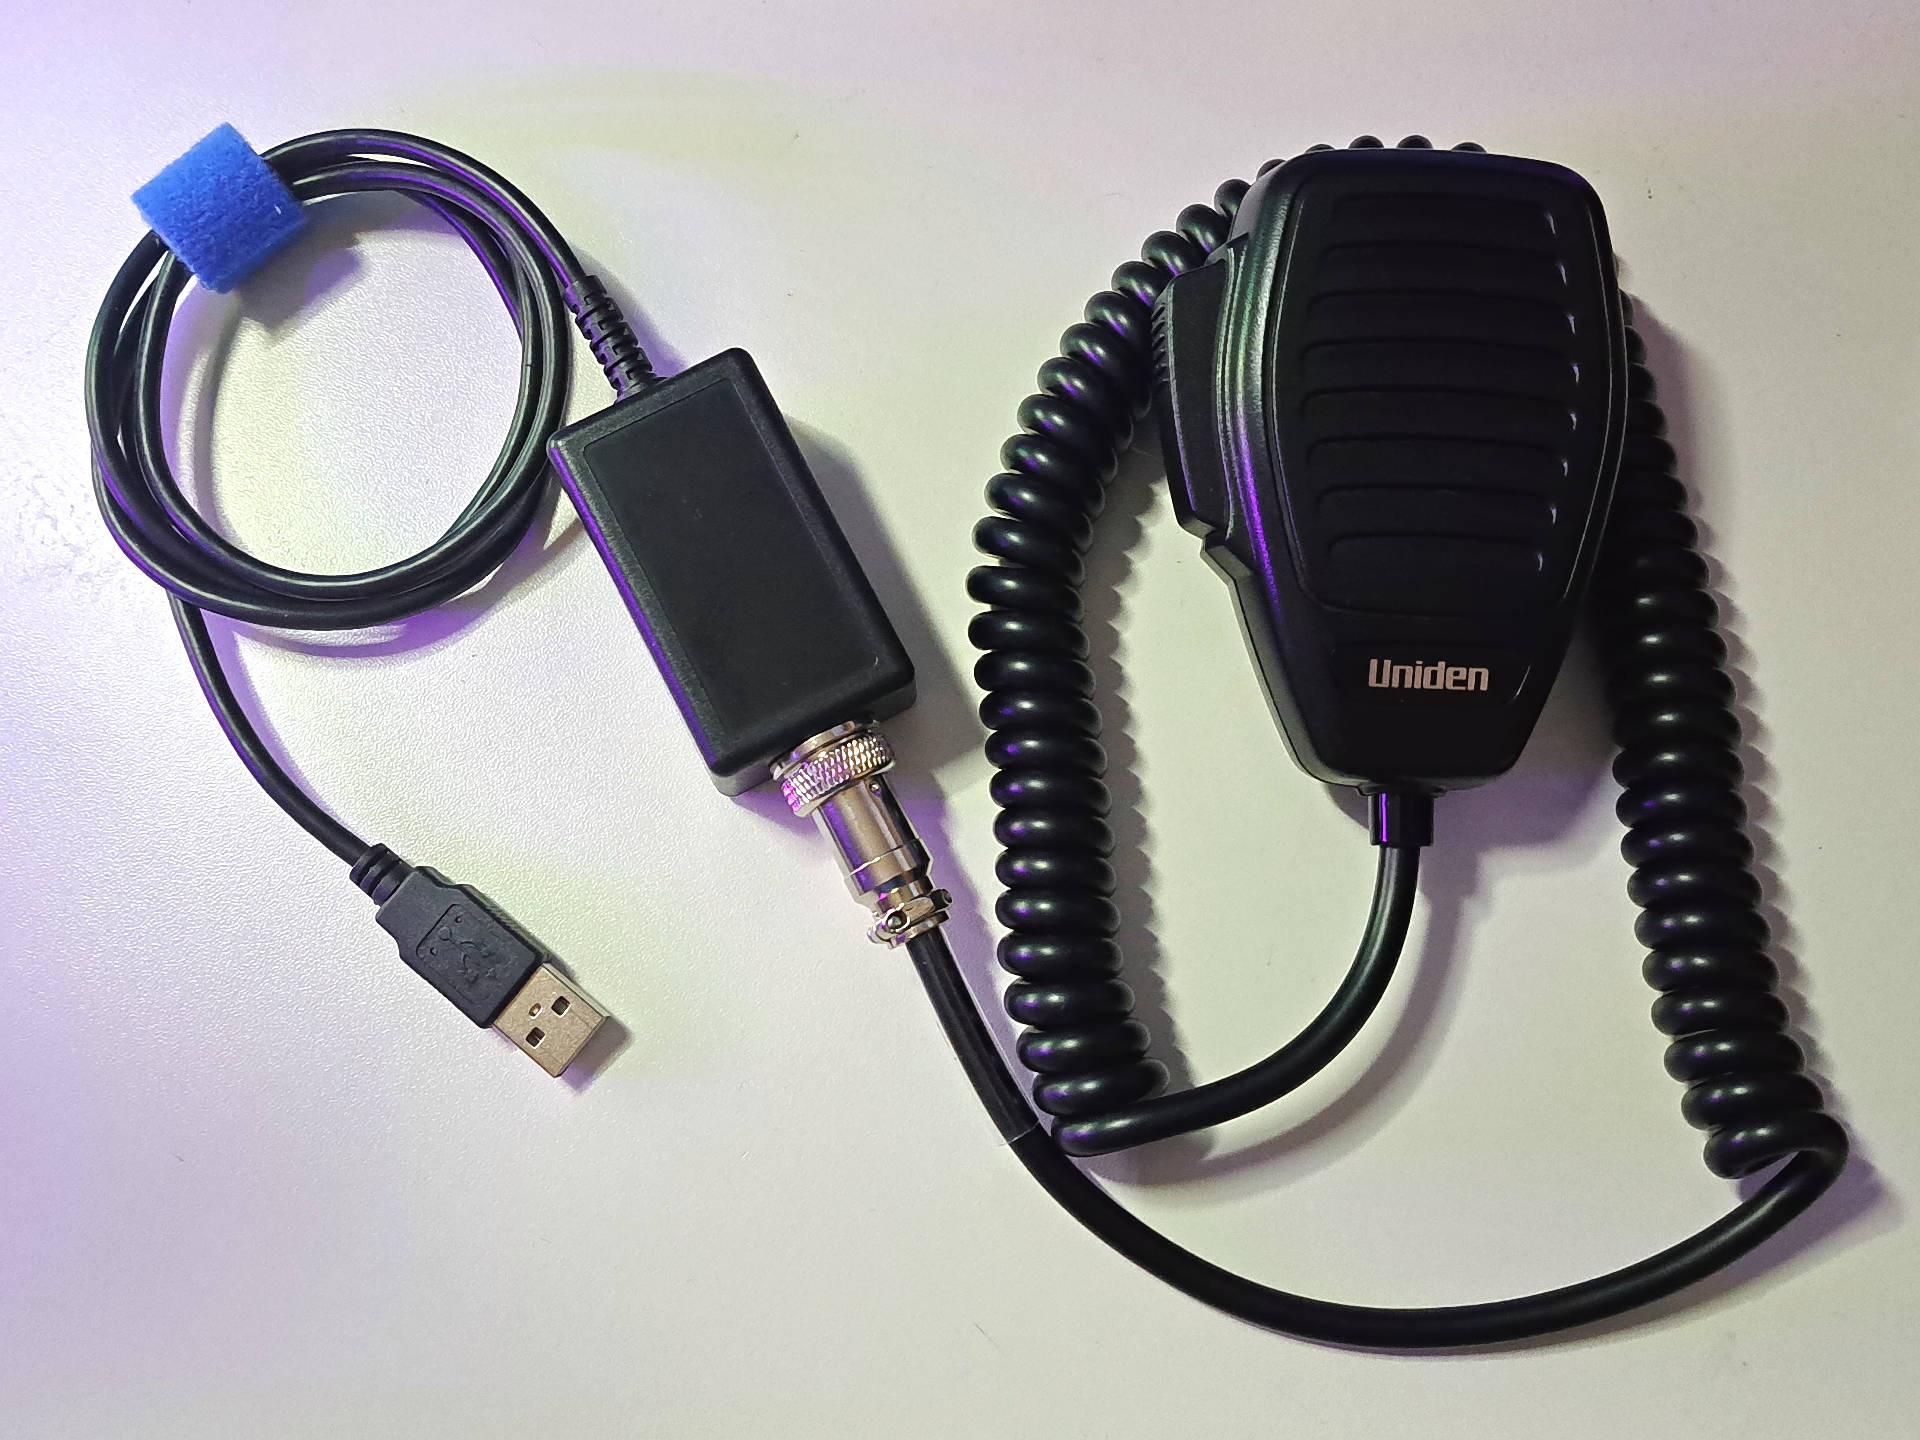
I’ve tested it with a Uniden BC645 and an Astatic 636L. The audio level on the Uniden is a little “hot”, but this is easy to adjust with the mic gain setting in your OS. The Astatic mic level starts low, but raises after a few seconds (unless using the mic modification described in a later section). Just bear in mind your mileage may vary since different mics will have different characteristics (and none were designed for use with a PC sound card). The following shows the size of the adapter compared to the Uniden mic.
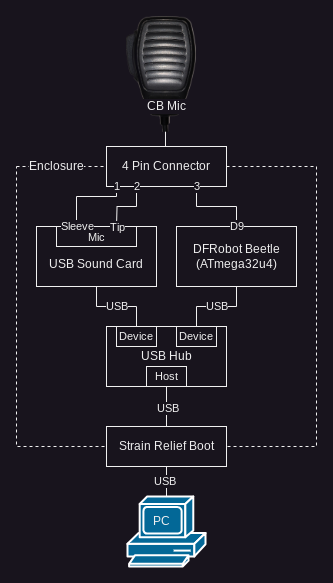
Block Diagram
This adapter is made of “off the shelf” parts to simplify the design phase (I’m lazy and wanted something now to use with a truck sim; I may eventually take a stab at making a single-board version of this). Essentially, this is just a USB sound card, Arduino, and USB hub stuffed into a box.
Components
All parts for this can (currently) easily be found online. Amazon links below are not affiliate links (I don’t particularly like Amazon, but it is a one-stop shop for the components used here).
| Part | Source |
|---|---|
| Uniden BC645 4-Pin Mic | Amazon |
| FE11SX4 USB Hub Module | Amazon |
| Sabrent USB Sound Card | Amazon |
| DFRobot Beetle | DFRobot Amazon |
| 4-Pin Connector | Amazon |
| Enclosure | Amazon |
| Cable Strain Relief | Amazon |
| USB Micro B Plug | Amazon |
| USB A Pigtail | Scrap cable |
| Double Sided Foam Tape |
Note: I used a DFRobot Beetle because it has a tiny footprint that will fit in the linked enclosure; any ATmega32u4 based Arduino clone should work fine.
Assembly
The enclosure listed above is compact, but will fit everything with careful arrangement. The following shows the assembly of all boards, connectors, and cables. The case and USB plug must be removed from the sound card to make it fit in the enclosure.
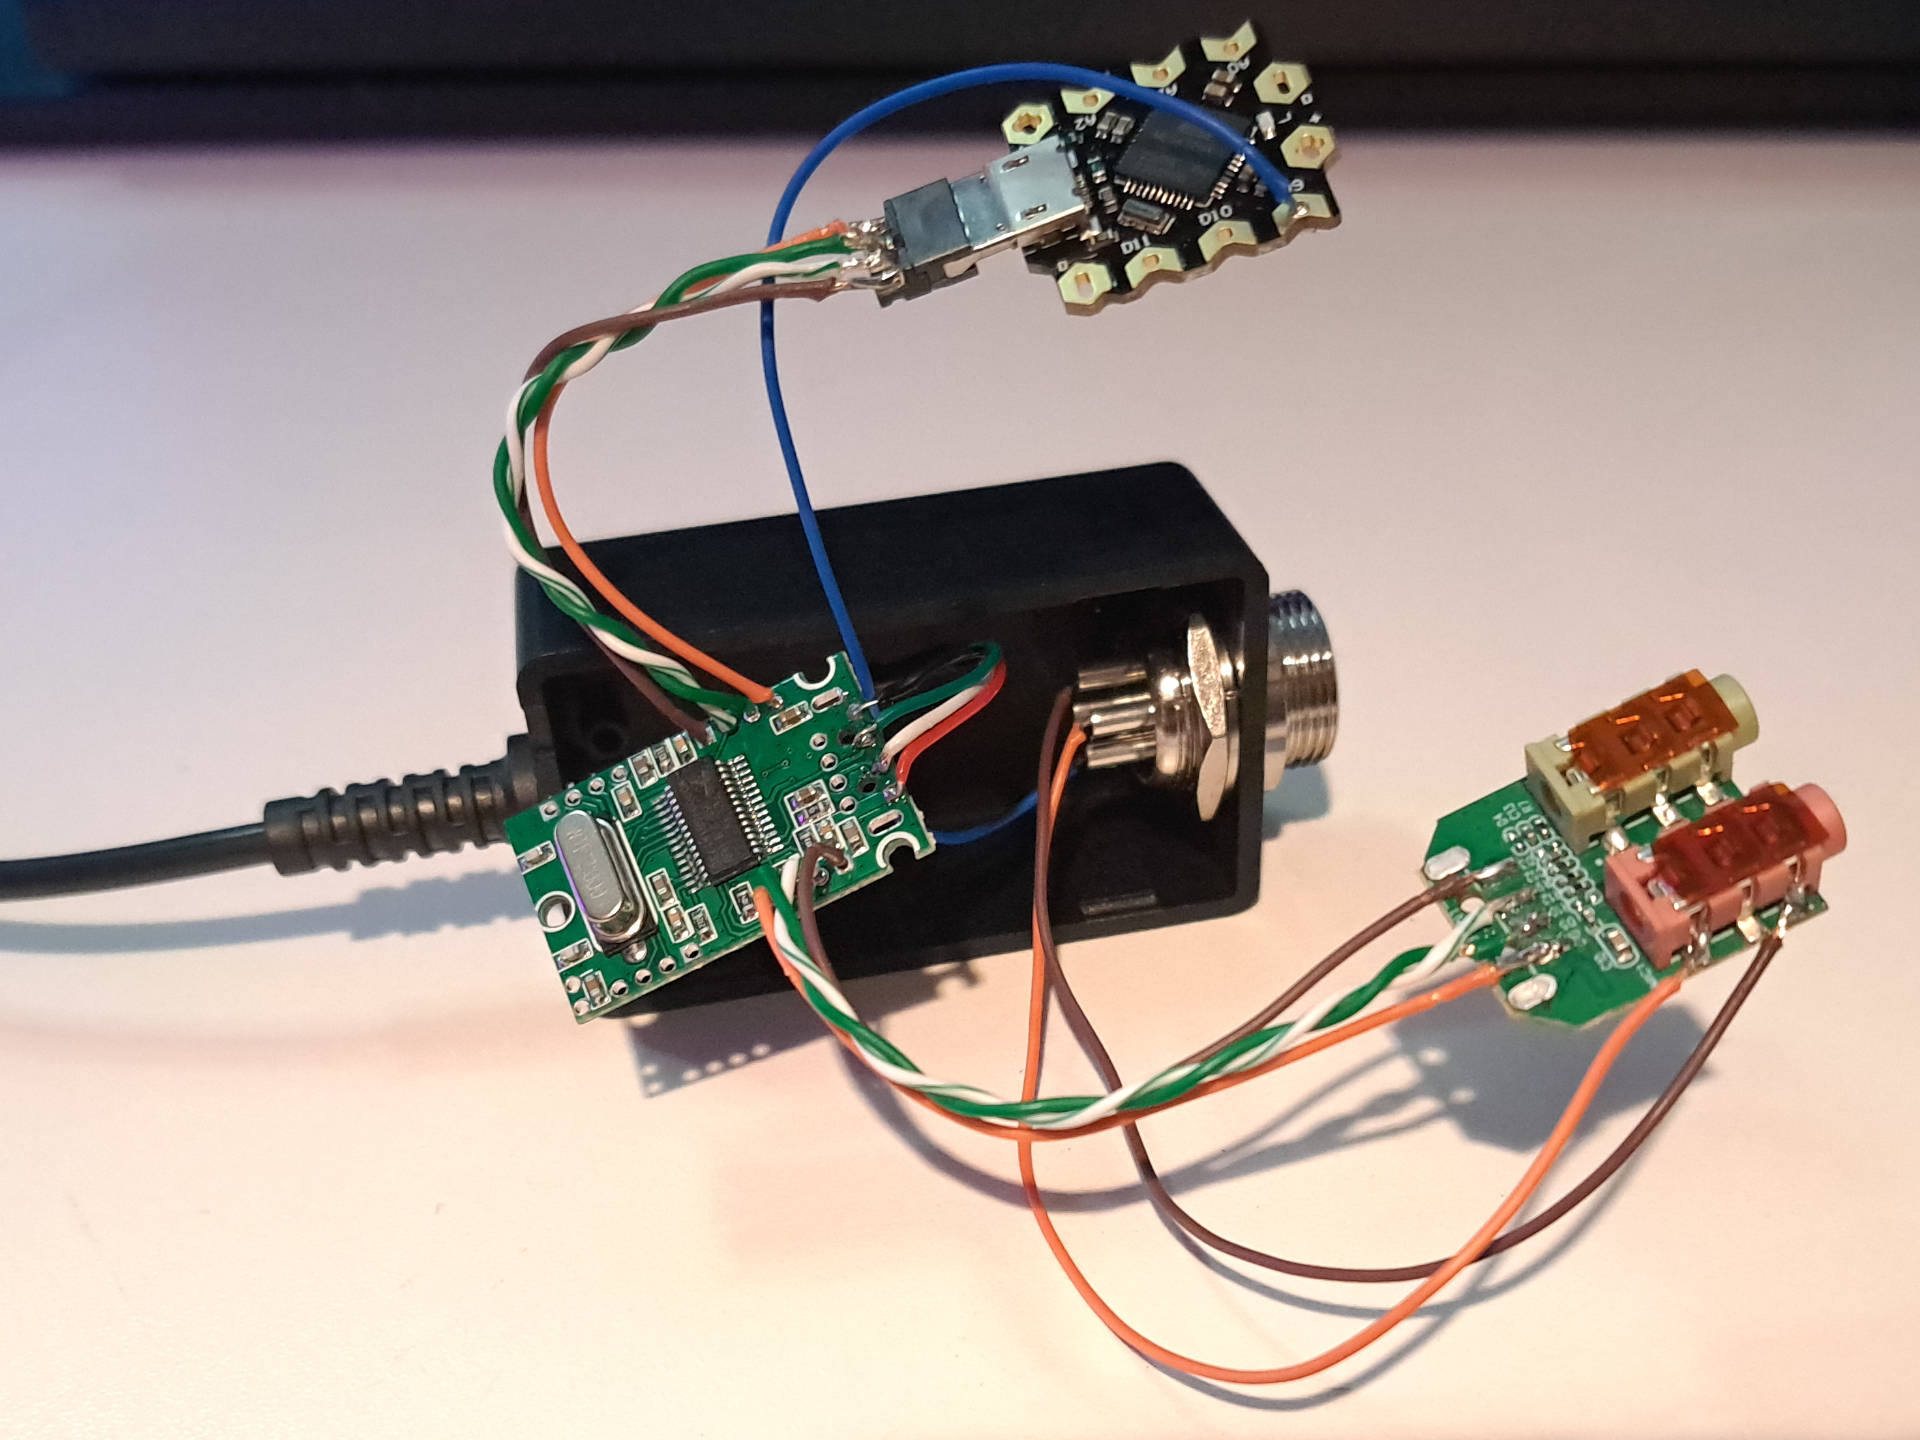
The following shows the boards arranged to fit within the enclosure. A piece of double sided foam tape is used to insulate the back of the sound card PCB from the other boards.

The DFRobot Beetle can be programmed after assembly is complete. See the below link to the firmware for instructions.
Optional: Mic Modification
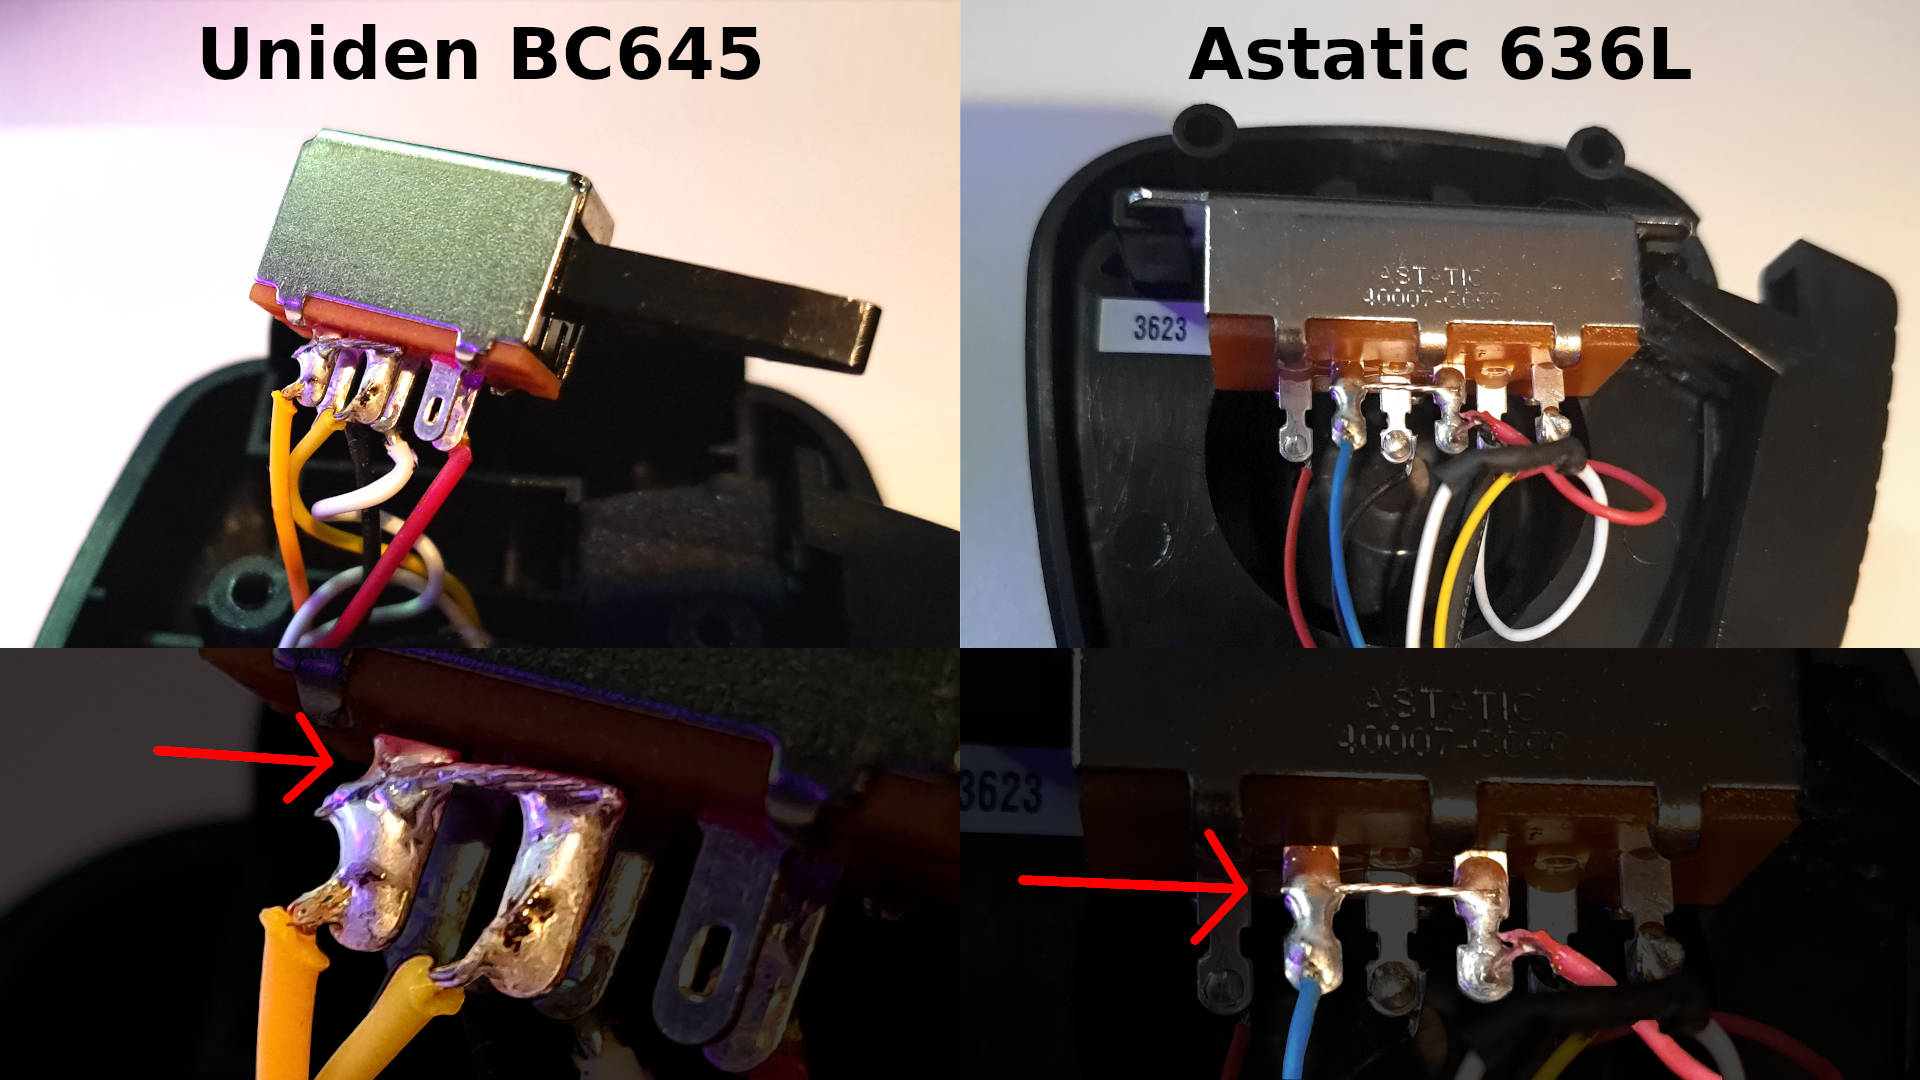
The above recipe will yield an adapter that should be compatible with most 4 pin CB mics. However, in a 4 pin mic the electret is connected to the circuit only while the PTT button is pressed. When pressing or releasing the button, there will be an audible “pop” in the audio stream. This can be eliminated by adding a wire into the CB mic that permanently connects the microphone to pin 2 of the connector. Below shows examples of how this can be done in the mics that were tested.
If you decide to do this modification, a small edit to the firmware should also
be made. The value of PTT_PRESS_HOLD_MS in cb-mic-usb-interface.ino has a
default that reduces the presence of the “pop” sound with unmodified mics (see
the notes in that file for details). Change this value to 20 to make the PTT
button more responsive.
Note: This modification will likely cause problems if you ever plan to use the CB mic in an actual CB. It’s definitely worth doing if you are creating a dedicated PC peripheral.
Links
- Firmware PTT board firmware source code